
Why use Handbrake?
Handbrake is an easy-to-use software available for Mac, Linux, and Windows. Originally designed for ripping DVDs, it is the most popular tool for creating H264 video from any video file or DVD.
Below you can find a step-by-step guide for using Handbrake to compress your video. If you’re in a hurry, you can also use the custom Handbrake presets we have uploaded to quickly apply these settings without having to enter them yourself.
Make H264 With Handbrake – Step-by-Step Guide
This tutorial assumes you have an HD video file that is 1920×1080 pixels. We will make the frame size a bit smaller and drastically reduce the file size (compared to, for example, a ProRes file from Final Cut Pro or Avid).
- Install Handbrake by choosing the version for your operating system from http://handbrake.fr/.
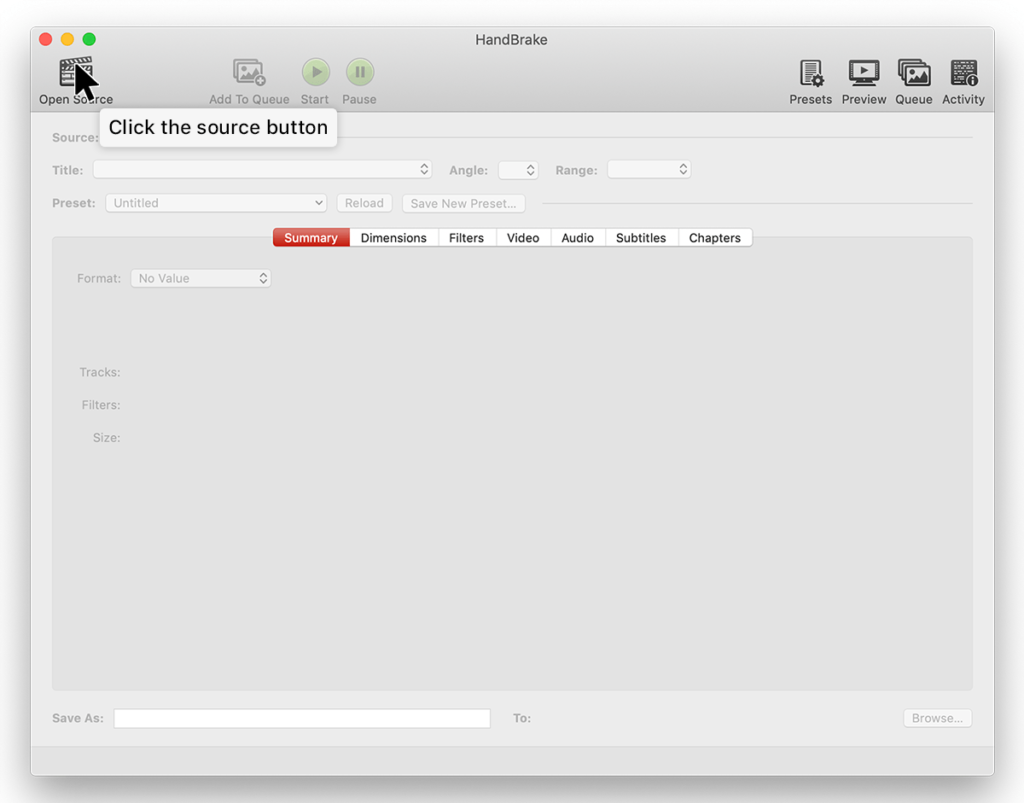
- Open Handbrake from your Applications or Programs folder.
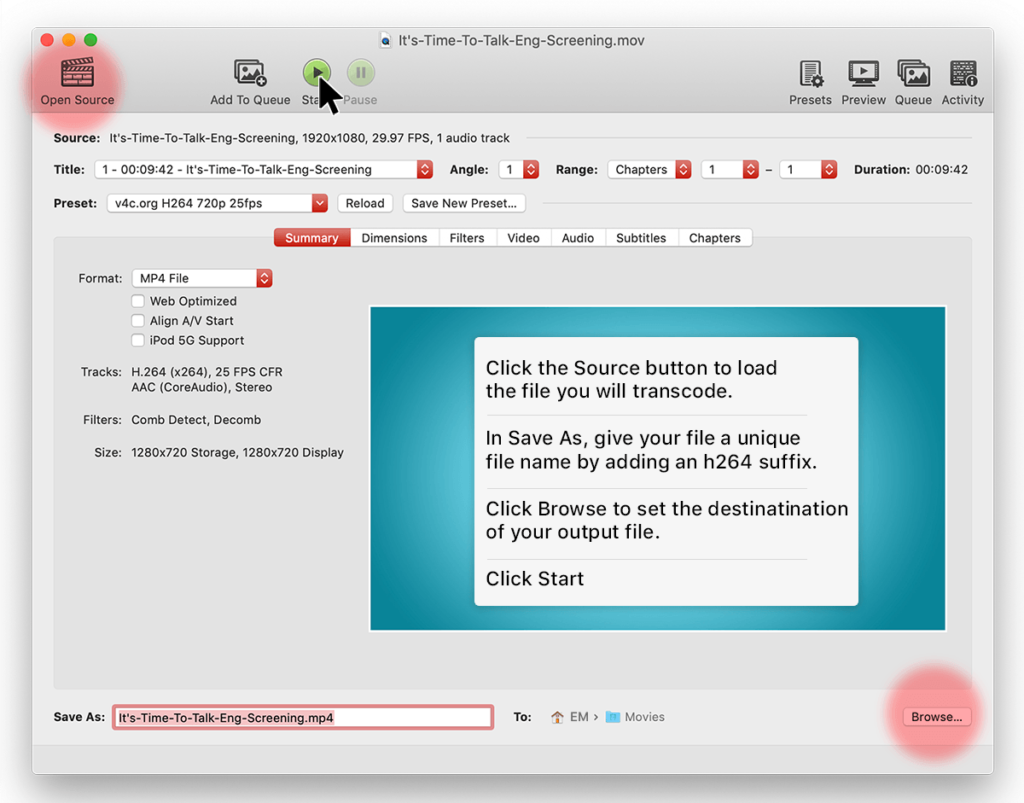
- Load your video file. A file browser window should have automatically opened for you to select your source video file (or DVD). If not, click the Open Source button.
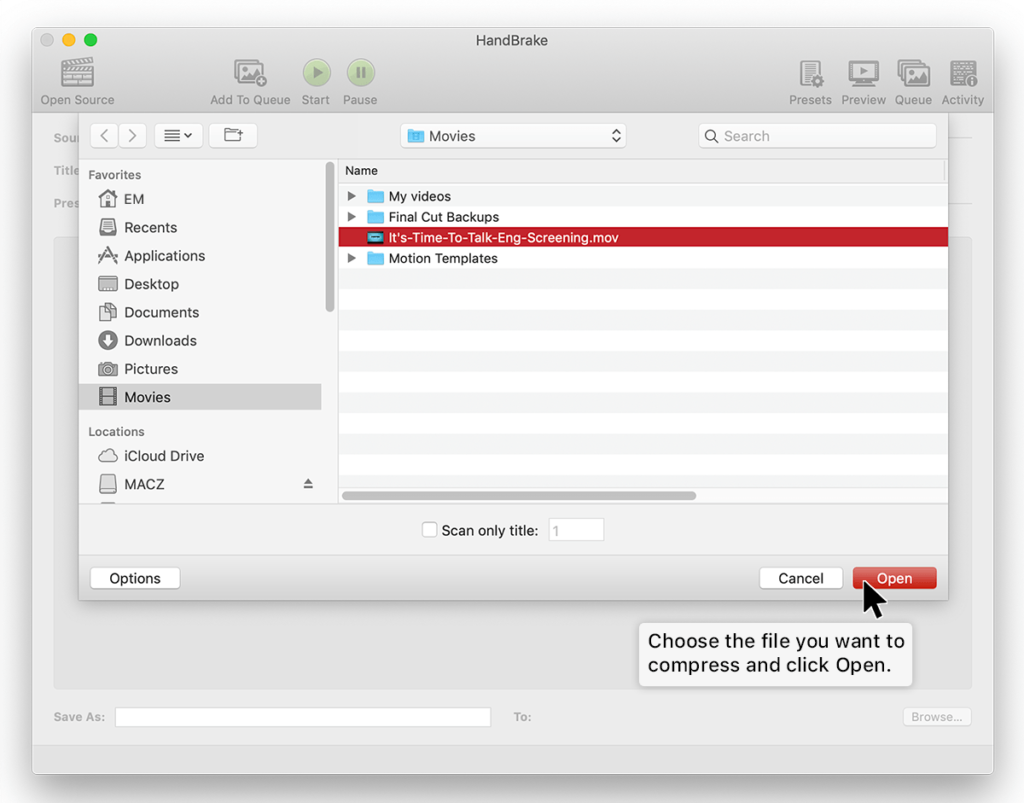
- Select the file you want to compress and click Open.
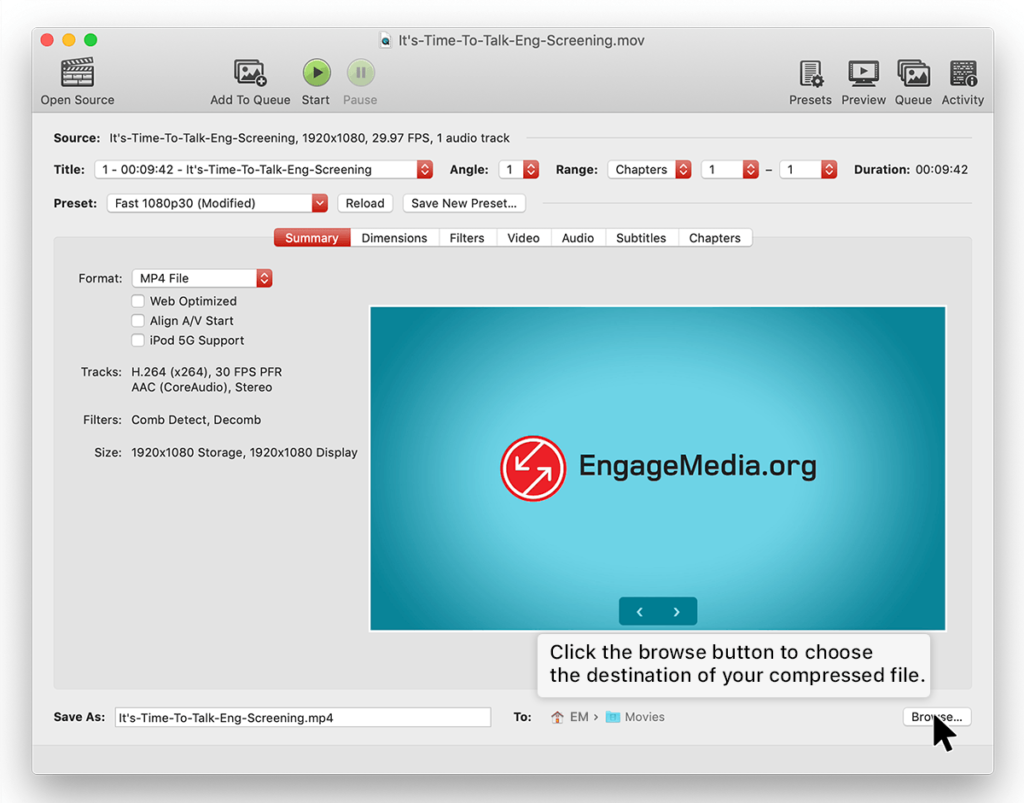
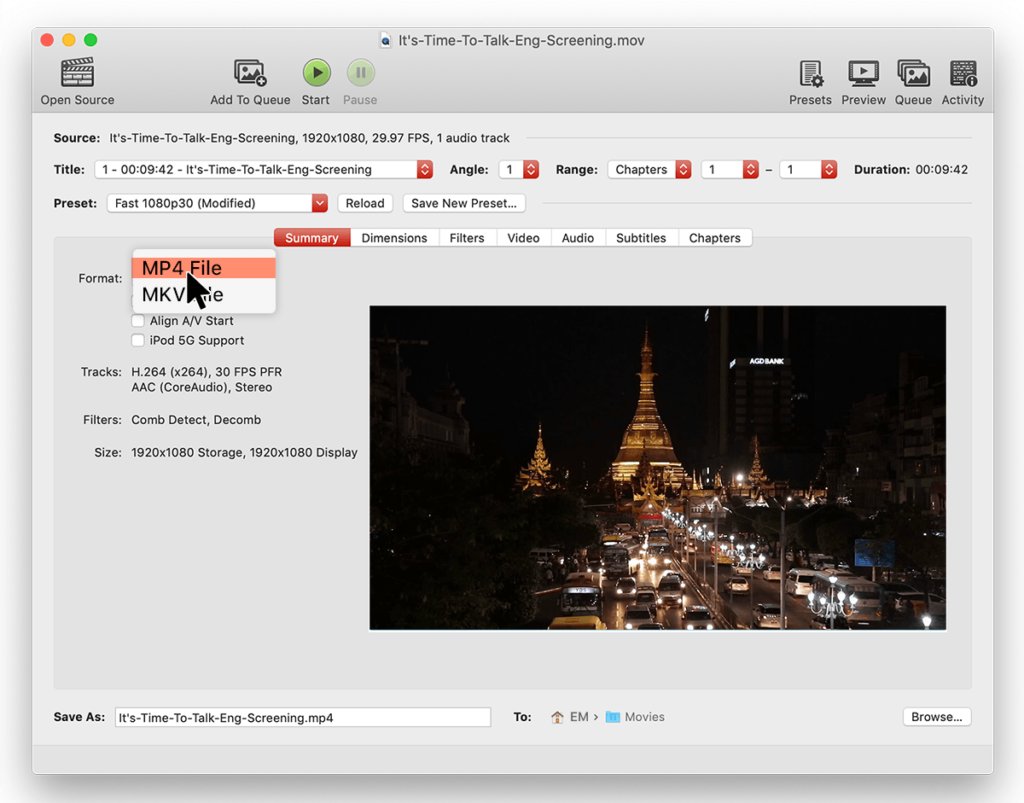
- Destination: Select where you want the transcoded video file to be saved by clicking Browse…
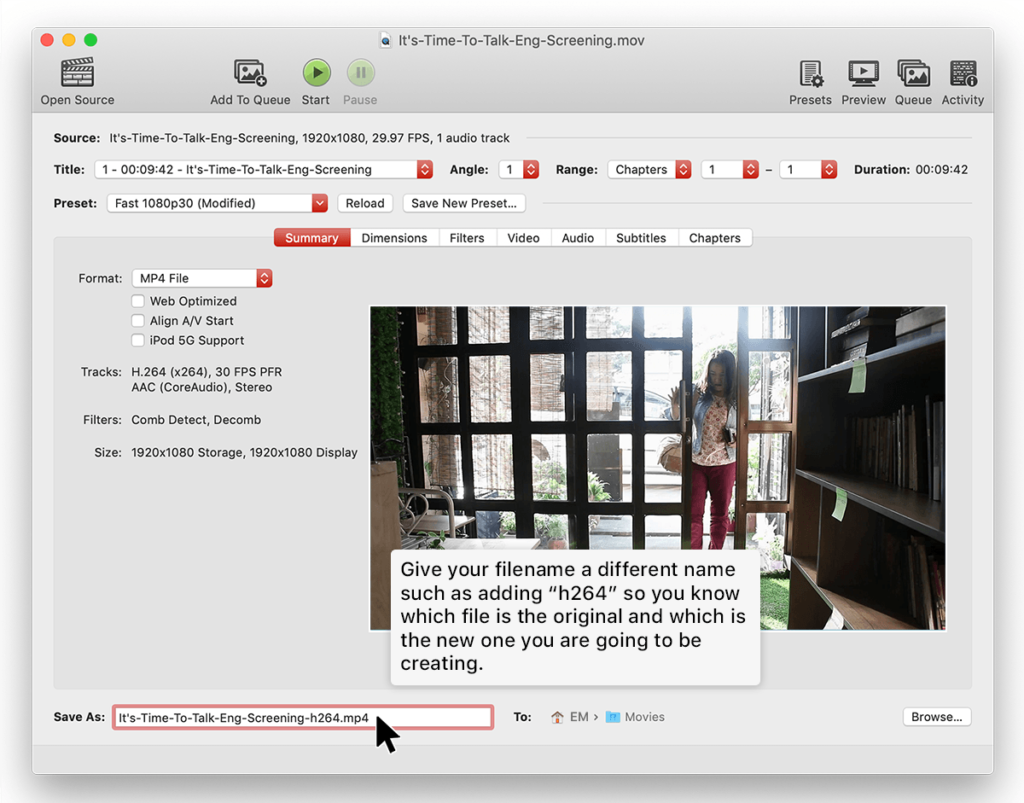
- In Save As, give the file an appropriate name such as “(Original-Filename)-h264.mp4” so that you know which version is the one you have compressed. Choose where you want to save it, and click Save.
- Choose Format MP4 file.
- For Video Codec, choose H.264 (x264).
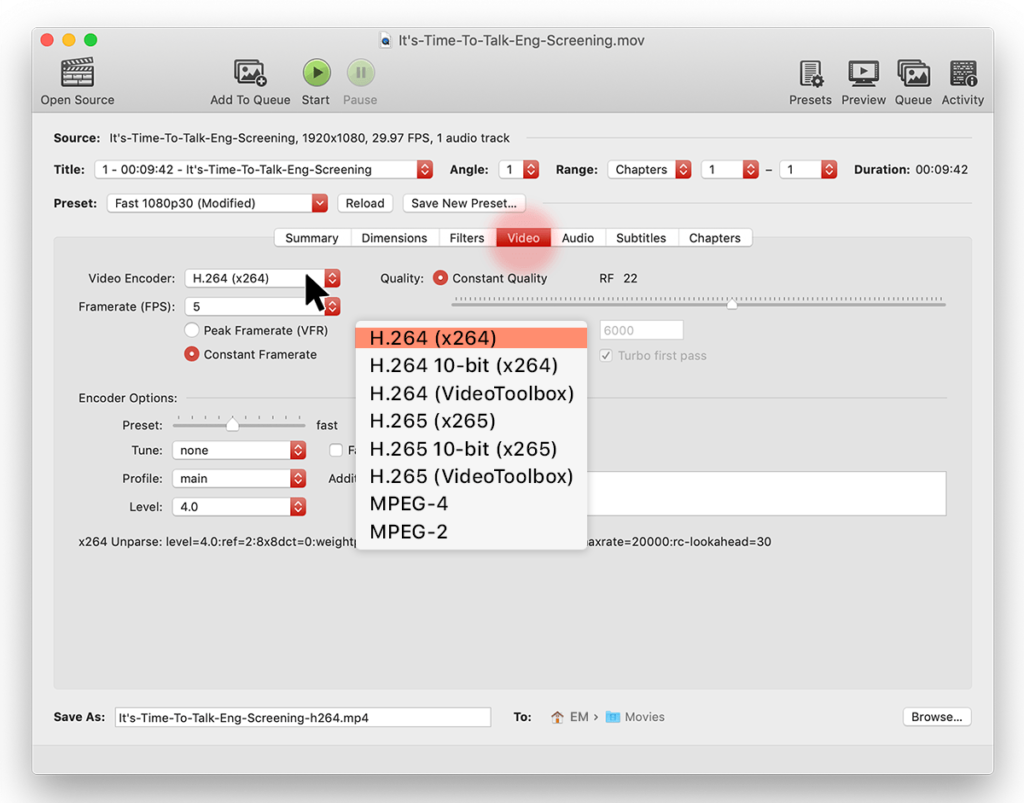
- Choose the High Profile under Encoder Options.
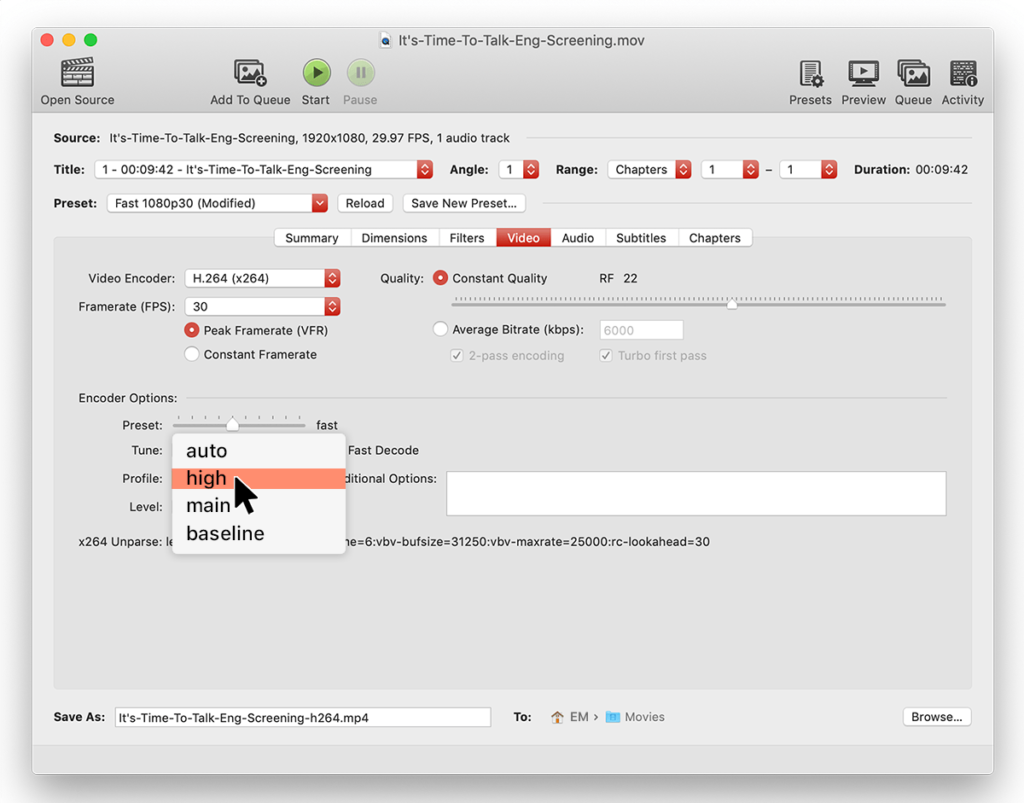
- In Framerate (FPS), choose Same as Source. You can also change the Frame rate of your video source if you need to. Choose 25 for PAL and 29.97 for NTSC. Make sure you tick the Constant Framerate button to ensure better compatibility.
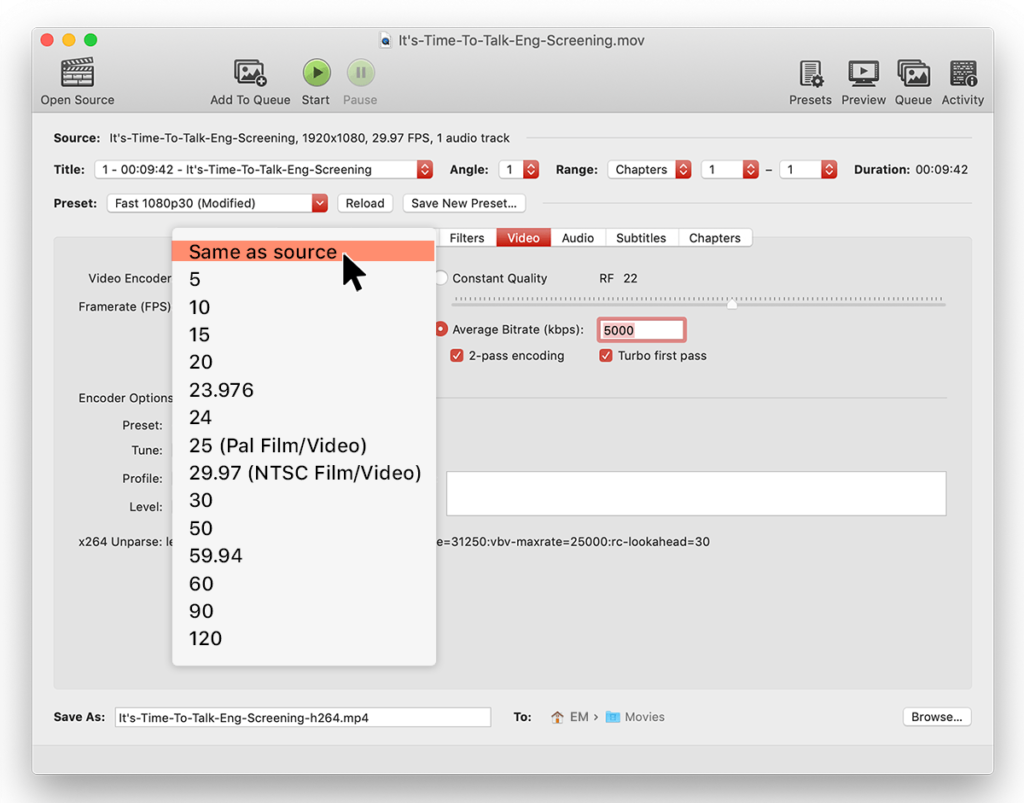
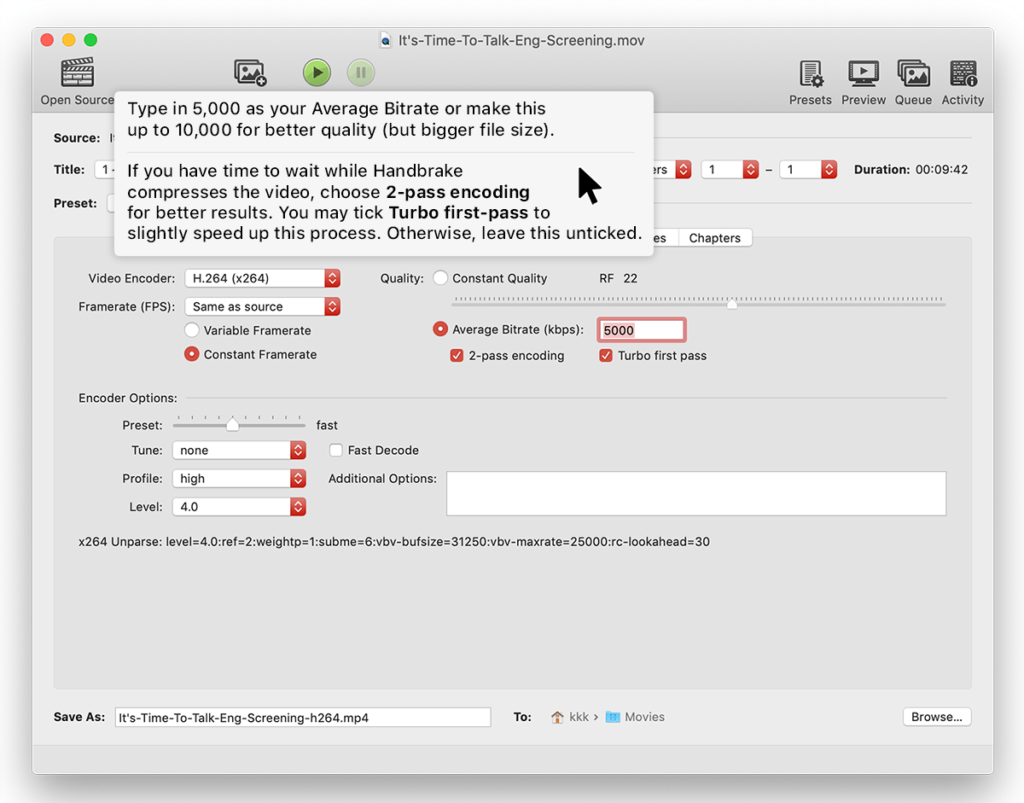
- Enter an Average Bitrate (kbps) for the video between 5,000-10,000 (choose 10,000 unless you want a much higher quality video that will take longer to upload and download — see File Size Guide for more details). If you have time to wait while Handbrake compresses the video, choose the 2-pass encoding for better results. You may tick Turbo first-pass to speed up this process slightly. Otherwise, leave this unticked.
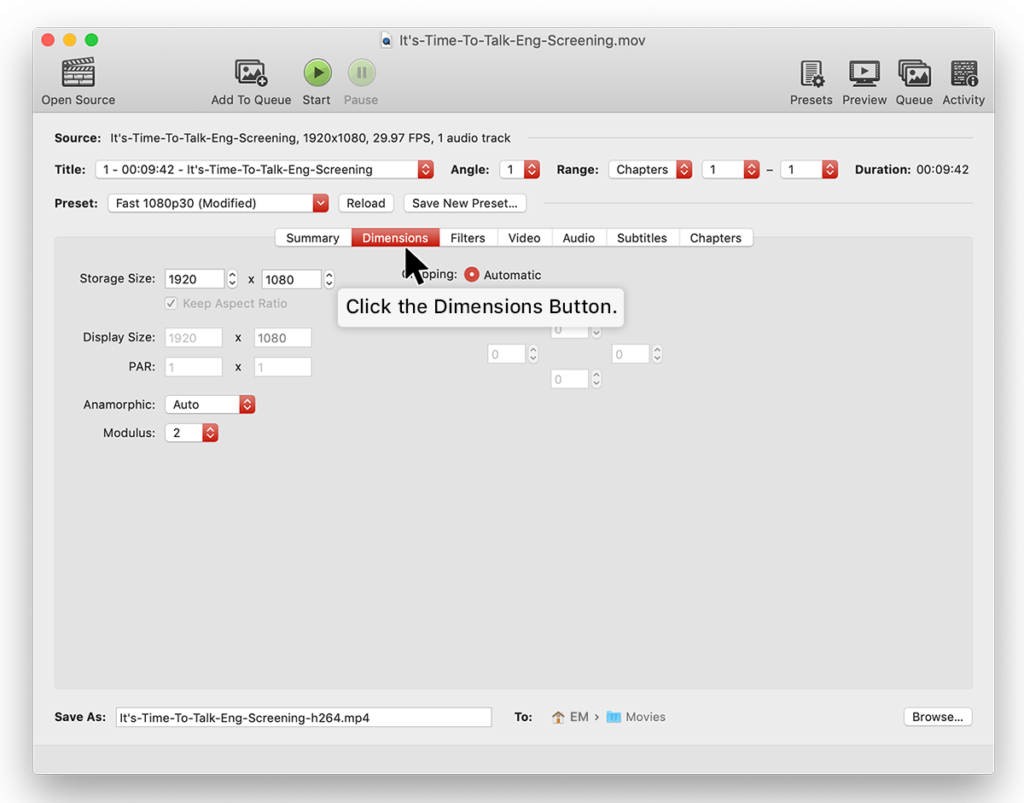
- Click the Dimensions button, which opens a new dialogue box where we can change the video frame size or resolution.
- Change Anamorphic to None (this feature is more suited to DVD ripping). Change Modulus to 16. Tick Keep Aspect Ratio. Use the stepper (click the arrow down) on Width to change Width from 1920 (full HD) down to 1280. Your Height should automatically then read as 720 if you have Kept Aspect Ratio ticked.
Here we are re-sizing the video, making it substantially smaller in the number of pixels it uses compared to 1920×1080. However, you may choose to keep it at 1920×1080 and use a higher bitrate such as 10,000 kbps (see above).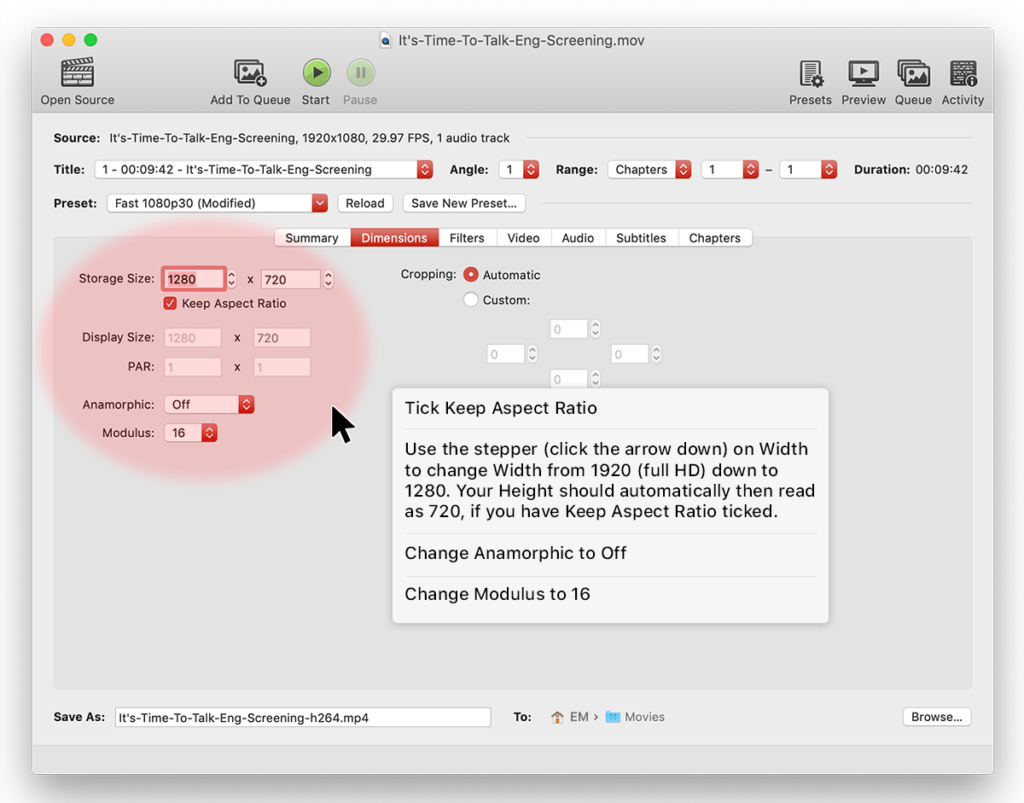
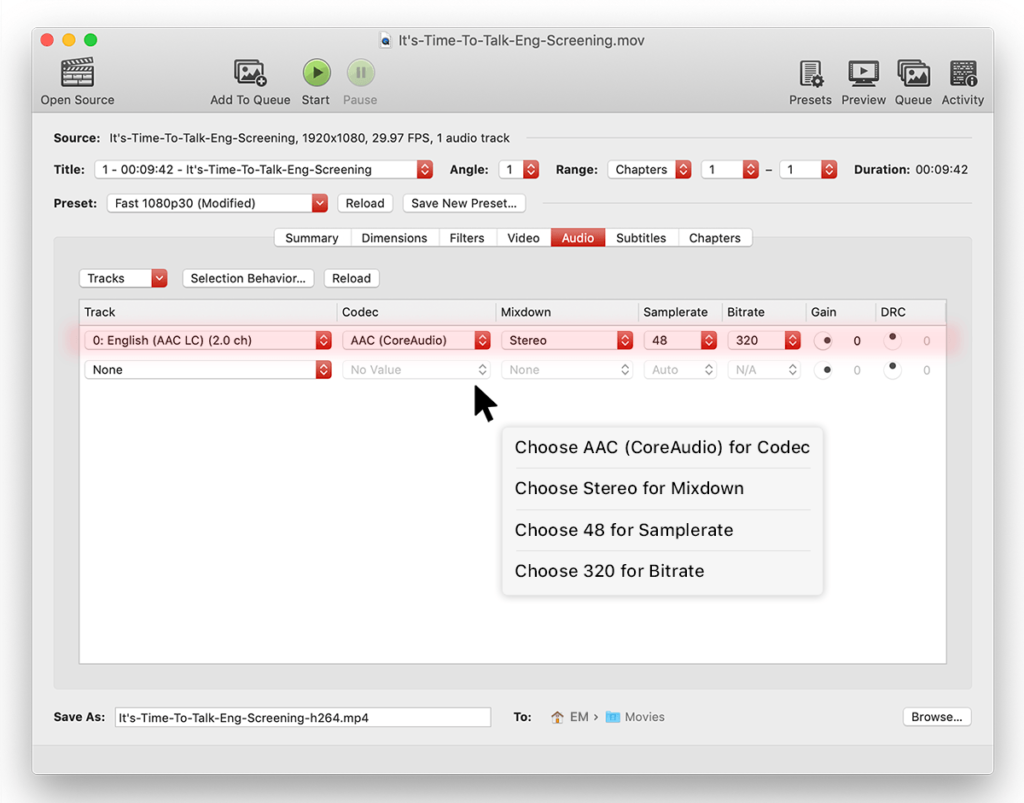
- Select the Audio tab and select AAC (CoreAudio) Codec. Choose the 48.000 Hz Samplerate. Choose Stereo for Mixdown. Choose 320 for your audio Bitrate.
- Hit the Start button and wait until the video has finished encoding.
You can choose to queue multiple files by clicking Add to Queue and can start/stop the Queue by clicking Show Queue. This is helpful if you have many files to compress.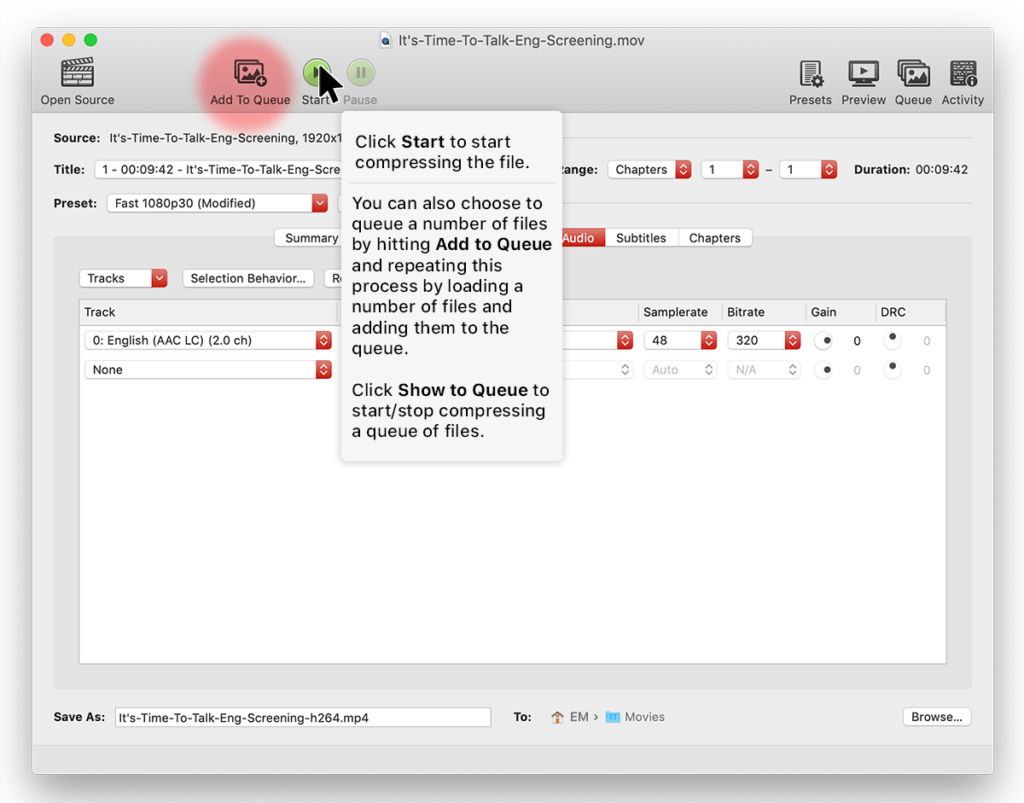
- Depending on your When done settings in preferences, Handbrake can notify or alert you when it’s done.
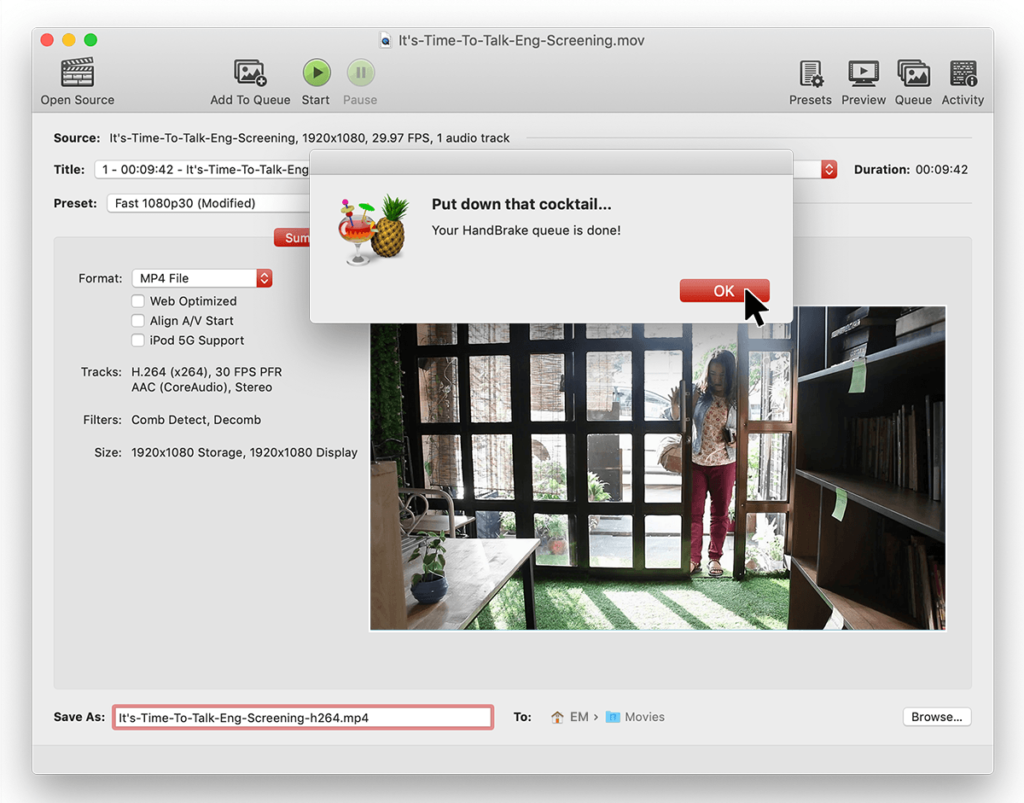
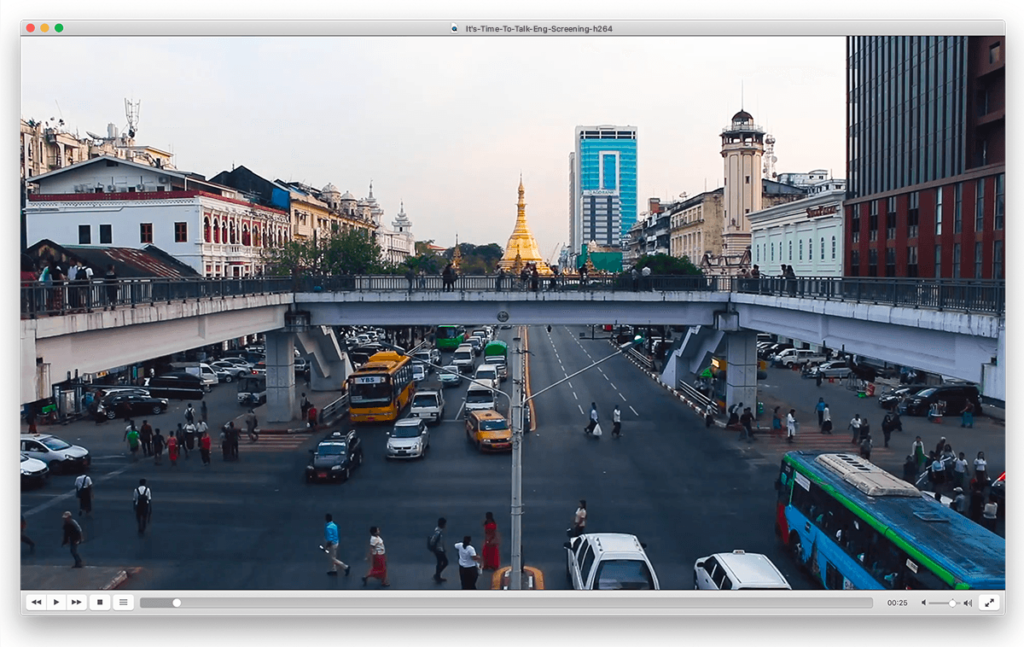
- Open your video file in VLC or another video player and check whether it looks good. Check periods of intense motion more carefully to make sure you don’t have too many compression artefacts. If the file doesn’t look good enough, try doing it again with a higher bitrate. If it looks good, then you are ready to upload the video file!
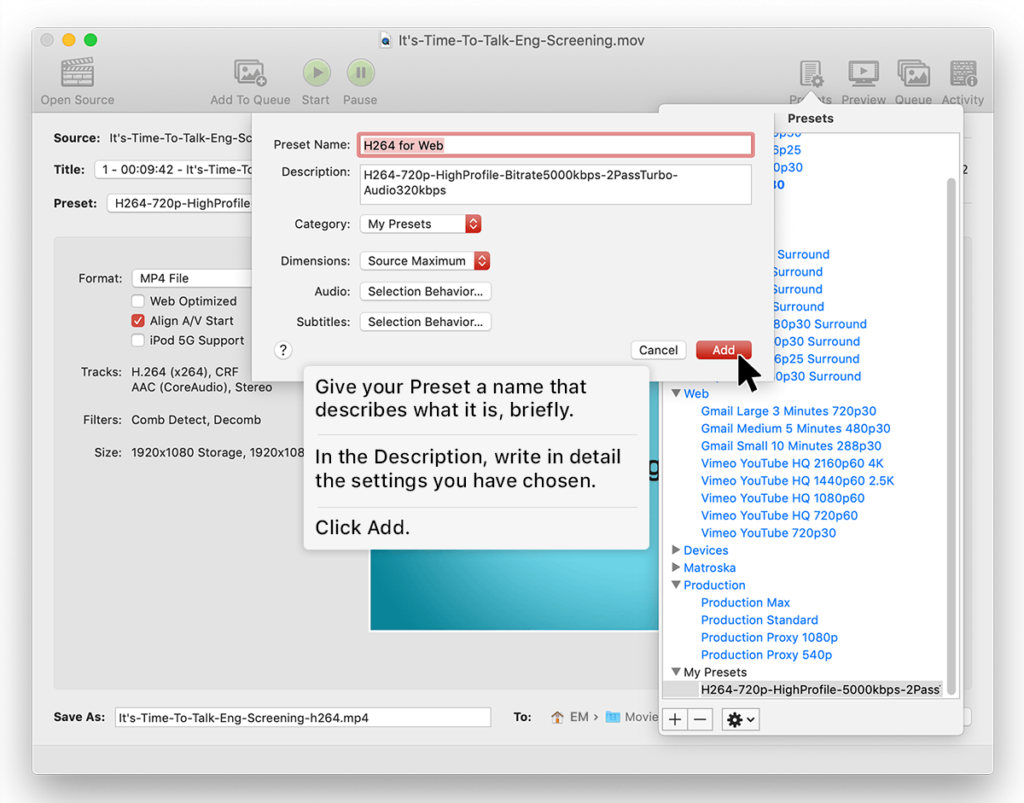
- If you like the settings you are using, you can save them as a preset by clicking the + sign in the bottom right of the Presets Drawer.
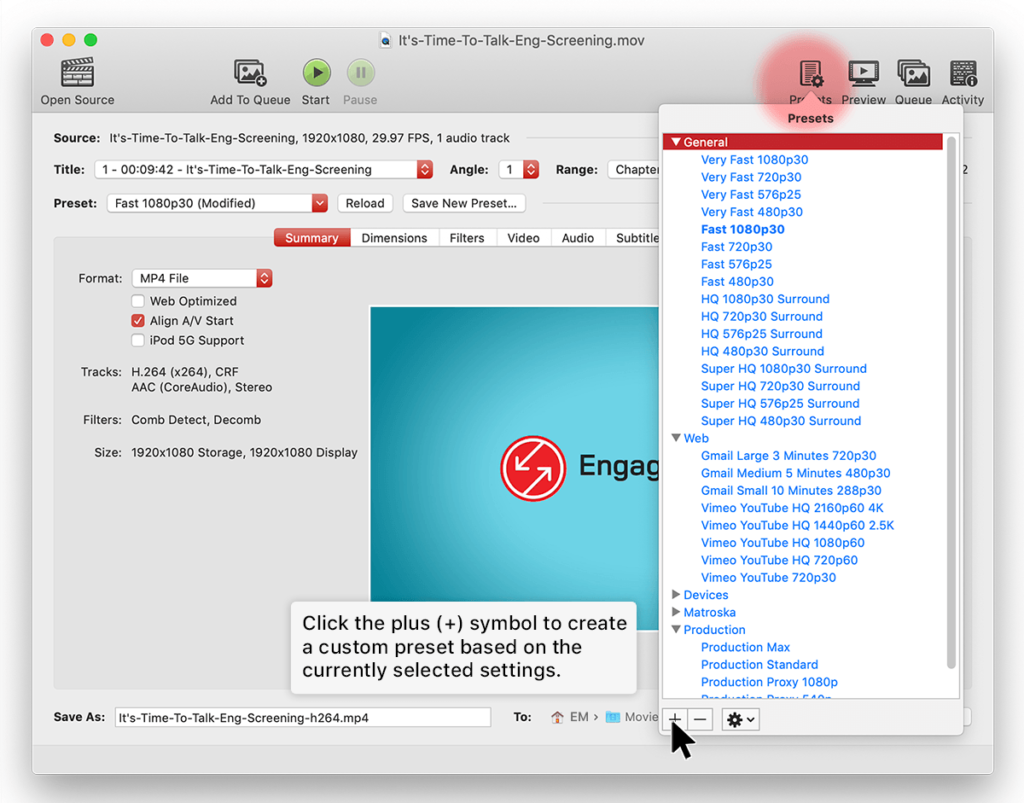
- Give it a Preset Name and Description.
Compressing H264 Using Presets
We have created a preset that uses the exact settings above, which makes it incredibly easy to apply these settings. To use this, first, you need to download the preset file.
For an original video file that is 25 frames per second, choose this preset file.
For an original video file that is 29.97 or 30 frames per second, choose this preset file.
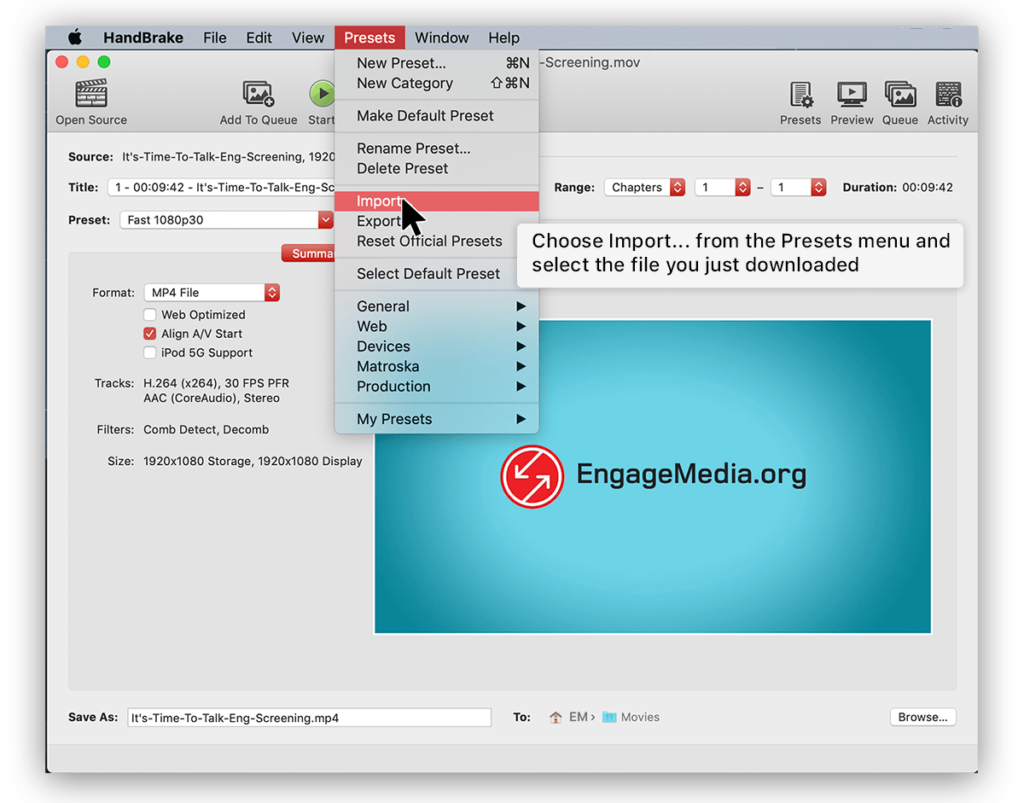
- To import the preset, go to Presets -> Import in the Handbrake top menu and select the preset file you just downloaded. They should appear in the Handbrake presets panel, available for use.
- Make sure you have loaded your original video file by clicking Open Source, and give it a Destination and new filename by clicking Browse… Next, click on the appropriate preset called “(import) v4c.org H264 720p 25fps”, or “(import) v4c.org H264 720p 30fps”, then click Start.
Find the Handbrake Tutorial Using H265 Codec here and for further information and a glossary of terms, read on…