Trimming your clips
Imagine you have filmed an action where nothing happened for 3 minutes and then something really exciting occurred, lasting for 40 seconds. After this you kept on filming, but nothing else of any interest happened. Total length: 5 minutes. Essential action: 40 seconds. You need to extract that short clip before uploading.
VidTrim is perfect for this. It has a more intuitive interface than some others. It also has a functional free version, and a low-cost upgrade to Pro. The Pro version is worth it if you are aiming to upload HD video onto the web. This is because VidTrim Pro enables you to compress your large HD video file to a more manageable size for web distribution. And you will still have the top quality version intact on your phone.
Here is a Step by Step guide on how to use VidTrim:
Download the free version through Google’s Play Store.
Open the app.

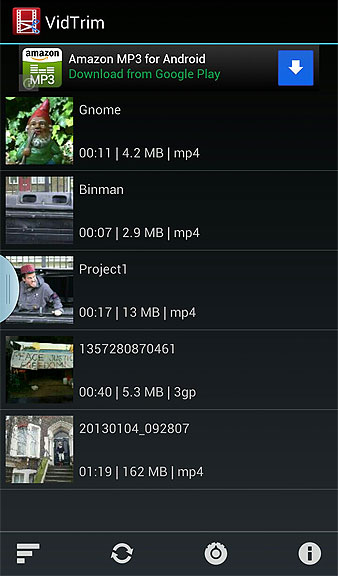
Select the video you wish to trim from the list.
Click the scissors.

Find your in point (where you want the video to start) and touch the picture to pause.
Move the left side of the slider to the in point.
The video will now play from that point. When you reach the out point touch the picture again to pause.

Move the right slider over the out point.
Check your edit. VidTrim will play the clip you have selected.
Click the scissors in the top right.

DO NOT select Trim Original, unless you want to permanently discard the footage you have trimmed away. Instead, select Save As New Clip.
Wait for the message Trim Completed to appear.
Click the pencil icon to rename your clip.

Rename your clip.
If you have shot HD, you may need to compress the clip for easier upload and streaming. For this you will need VidTrim Pro. The Pro version adds a compression icon (the cog-wheel). Click this.
VidTrim Pro will by default give you a compression for your edit which is the same as your original video file.
Here are the results of our compression test from a one minute clip of Full HD 1080p video on a Samsung Galaxy Note 2:
| Compressed to | Time taken | File size per min |
| HD 720p | 10 mins | 30mb |
| SD 480p | 7 mins | 8.4mb |
| SD 320p | 6 mins | 8mb |
In terms of file size there was little advantage in compressing to 320p, so for fast upload of a clip from a smartphone, we recommend compressing to 480p.

Choose your compression and click the compression icon at the top.

Wait for your transcoding to complete and View Result to begin uploading.
Before uploading to the web, it’s a good idea to change phone settings to Airplane mode and close other apps, as any interruption will stop the upload.

Click the Share icon. Select where you want to send your clip. We will select YouTube.

Fill out the form, as you would normally to upload a video to YouTube, and click upload.
